


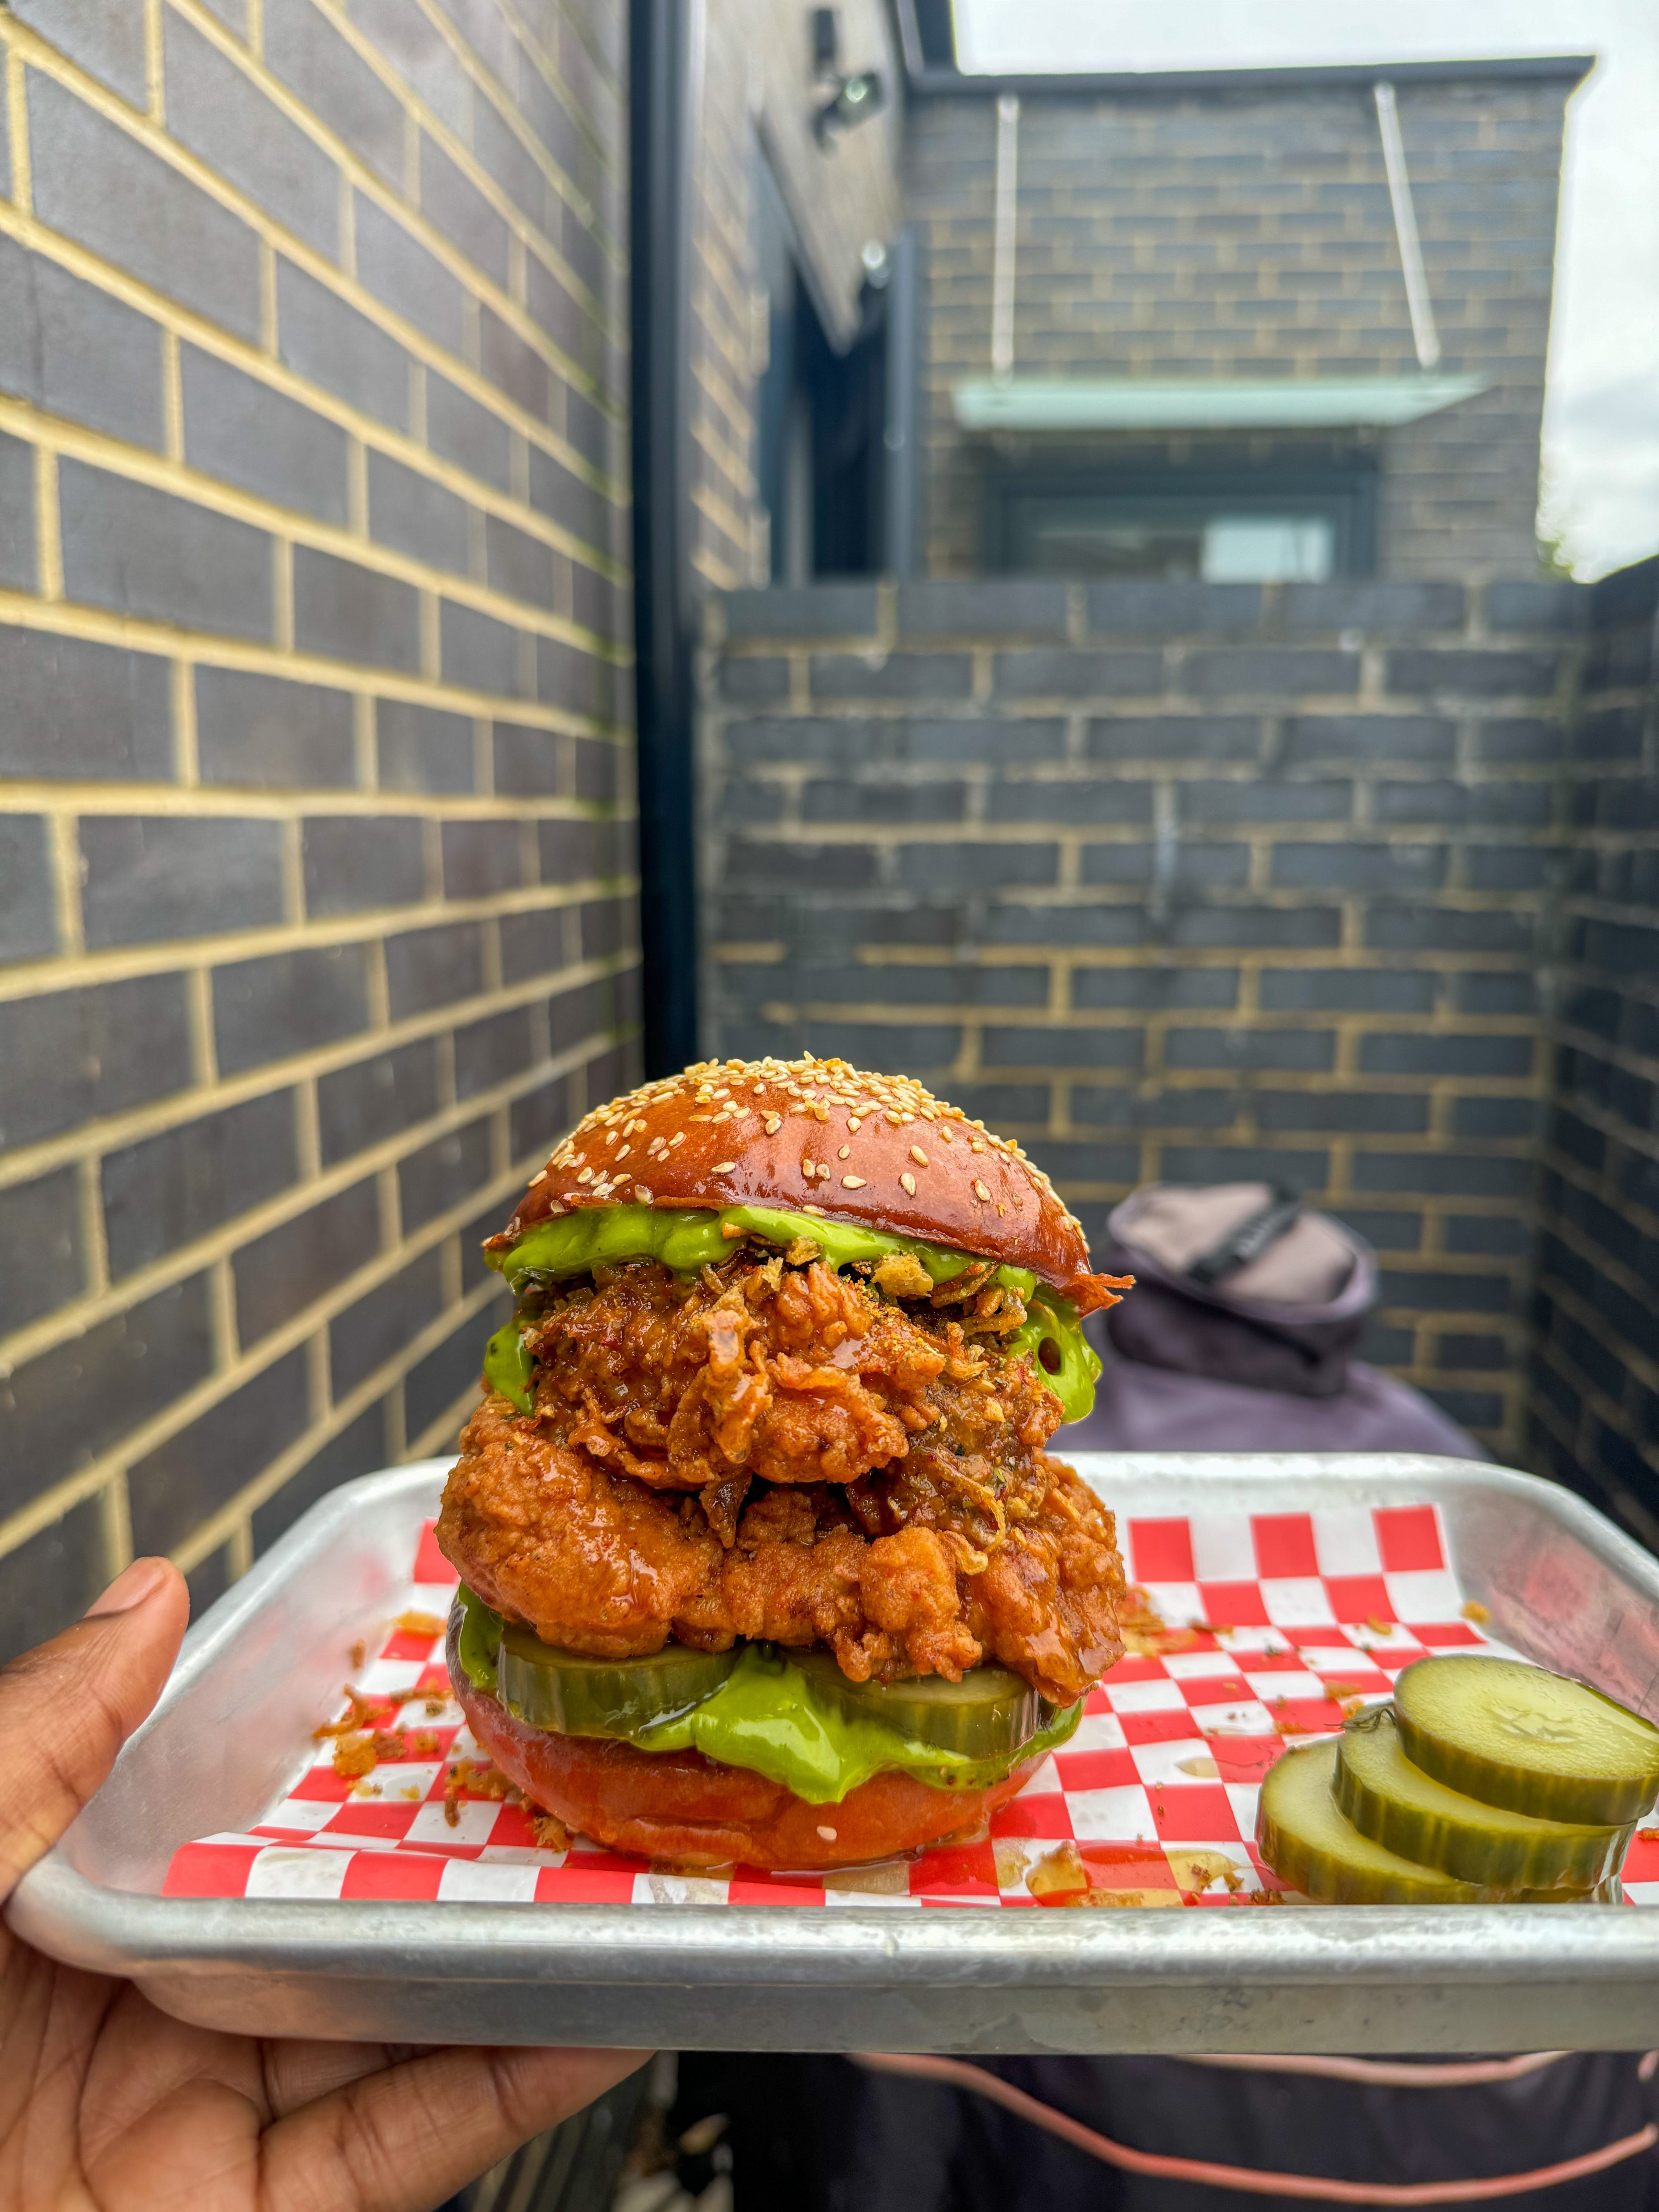
Hot honey fried chicken sandwich!
Crispy fried chicken, scallion chive mayo, tangy pickles and chicken skin garlic shallot crunch! Big flavours

Issue #8 of Unfiltered Flavours+!
Sorry for the lack of posts, personal life has been a lot and I’ve actually not been cooking as much. I’m back though land this weeks recipe is a banger! We’re covering burger buns, fried chicken, a gorgeous scallion chive mayo, quick dill pickles and a chicken skin shallot garlic crunch. Wow, that was a mouthful BUT I needed to make up for lost time…
Now I guess I’ve been feeling a little uninspired recently, especially with the change of weather and summer being over. I was reorganising my kitchen cupboards when I stumbled upon a jar of hot honey from a Nando’s and Dr Stings honey collaboration. When I saw that, it triggered me to go make a fried chicken sandwich!
Flavours & Ingredients
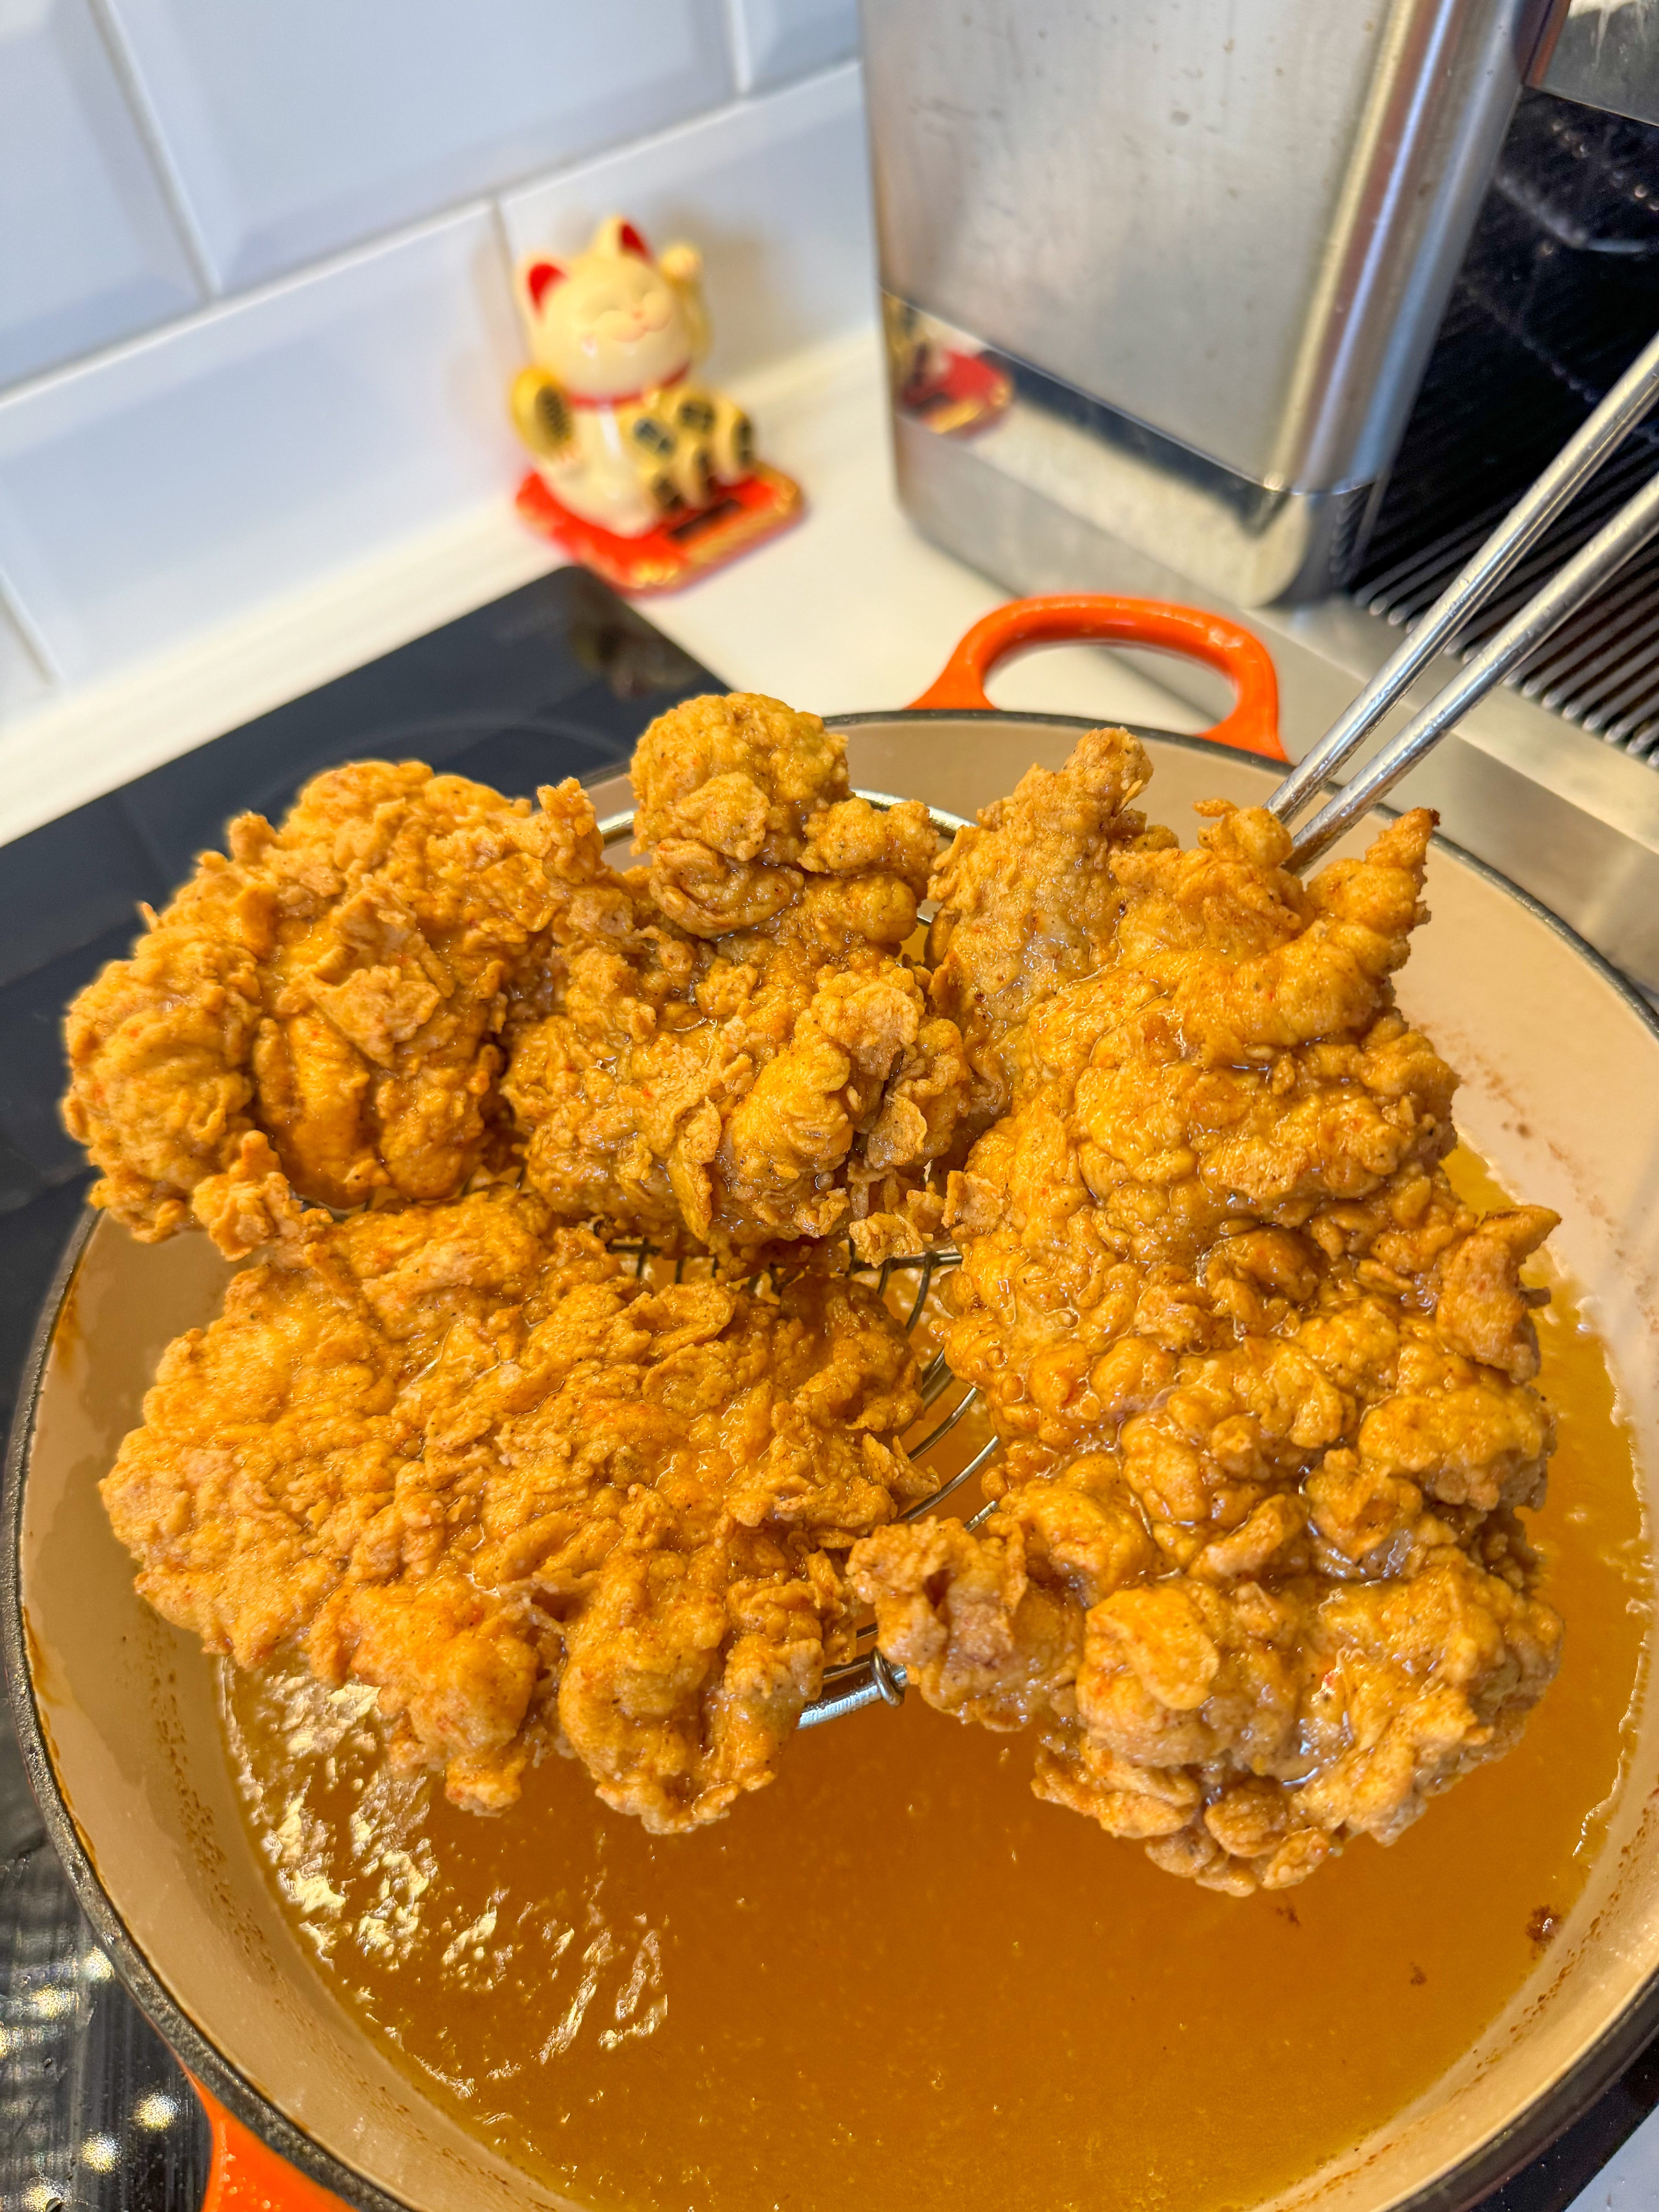
When it comes to a fried chicken sandwich there’s a few key components you need. Your chicken coating needs to be sturdy and not slop off. You need a good sauce/mayo and if you don’t have pickles in involved…. GROW UP. Jokes aside, you’ll definitely want something with an acidy hit, because it cuts through the richness of fried chicken.
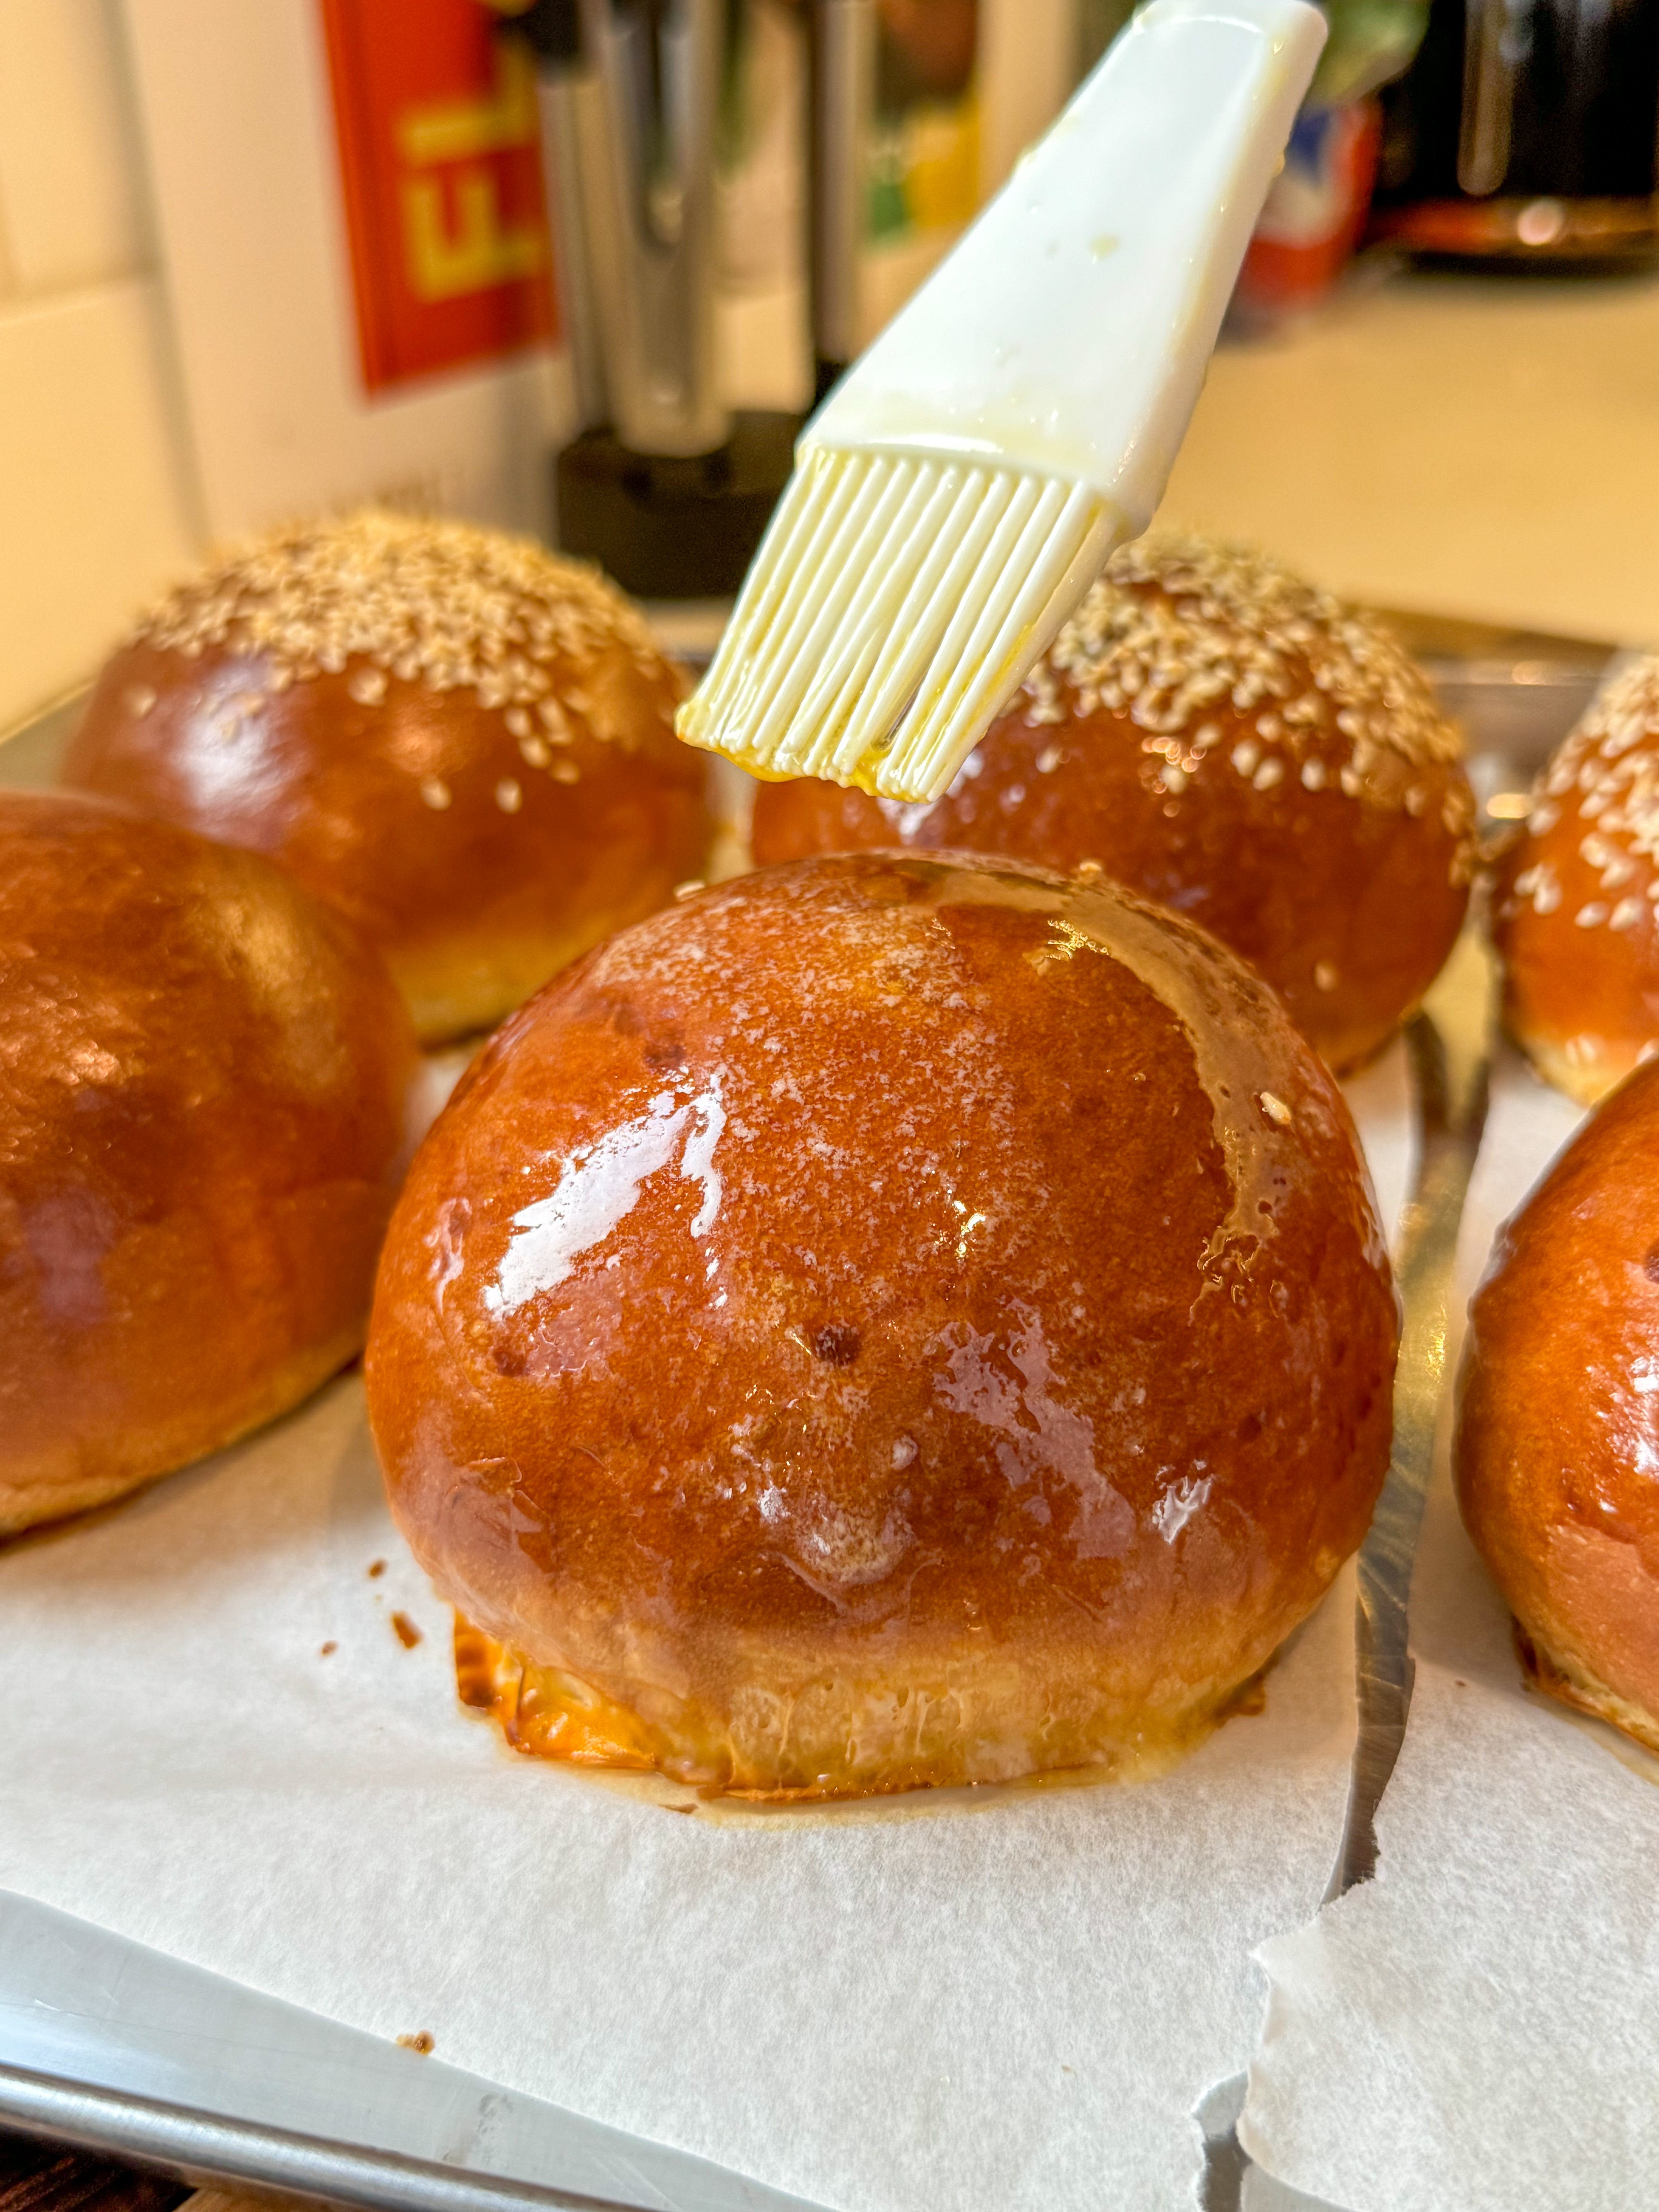
The bun is truly one of the most important parts imo. Hear me out… The bun is what holds together a sandwich/burger. Its structure needs to be soft enough to bounce back, but not so soft that it goes soggy from a sauce or collapses as you handle it. Taste wise, I’ve always preferred a sort of milk bread/brioche hybrid bun. I like the sweetness it brings. I can’t tell you how many times I’ve had a burger and the bun has been so rubbish that it’s not edible. If my bun is soggy there’s categorically no way I’m eating it haha
Now I added an extra component and that’s a chicken skin shallot and garlic crunch. This stuff is ridiculous and to me it takes this from perfect to out of this world!
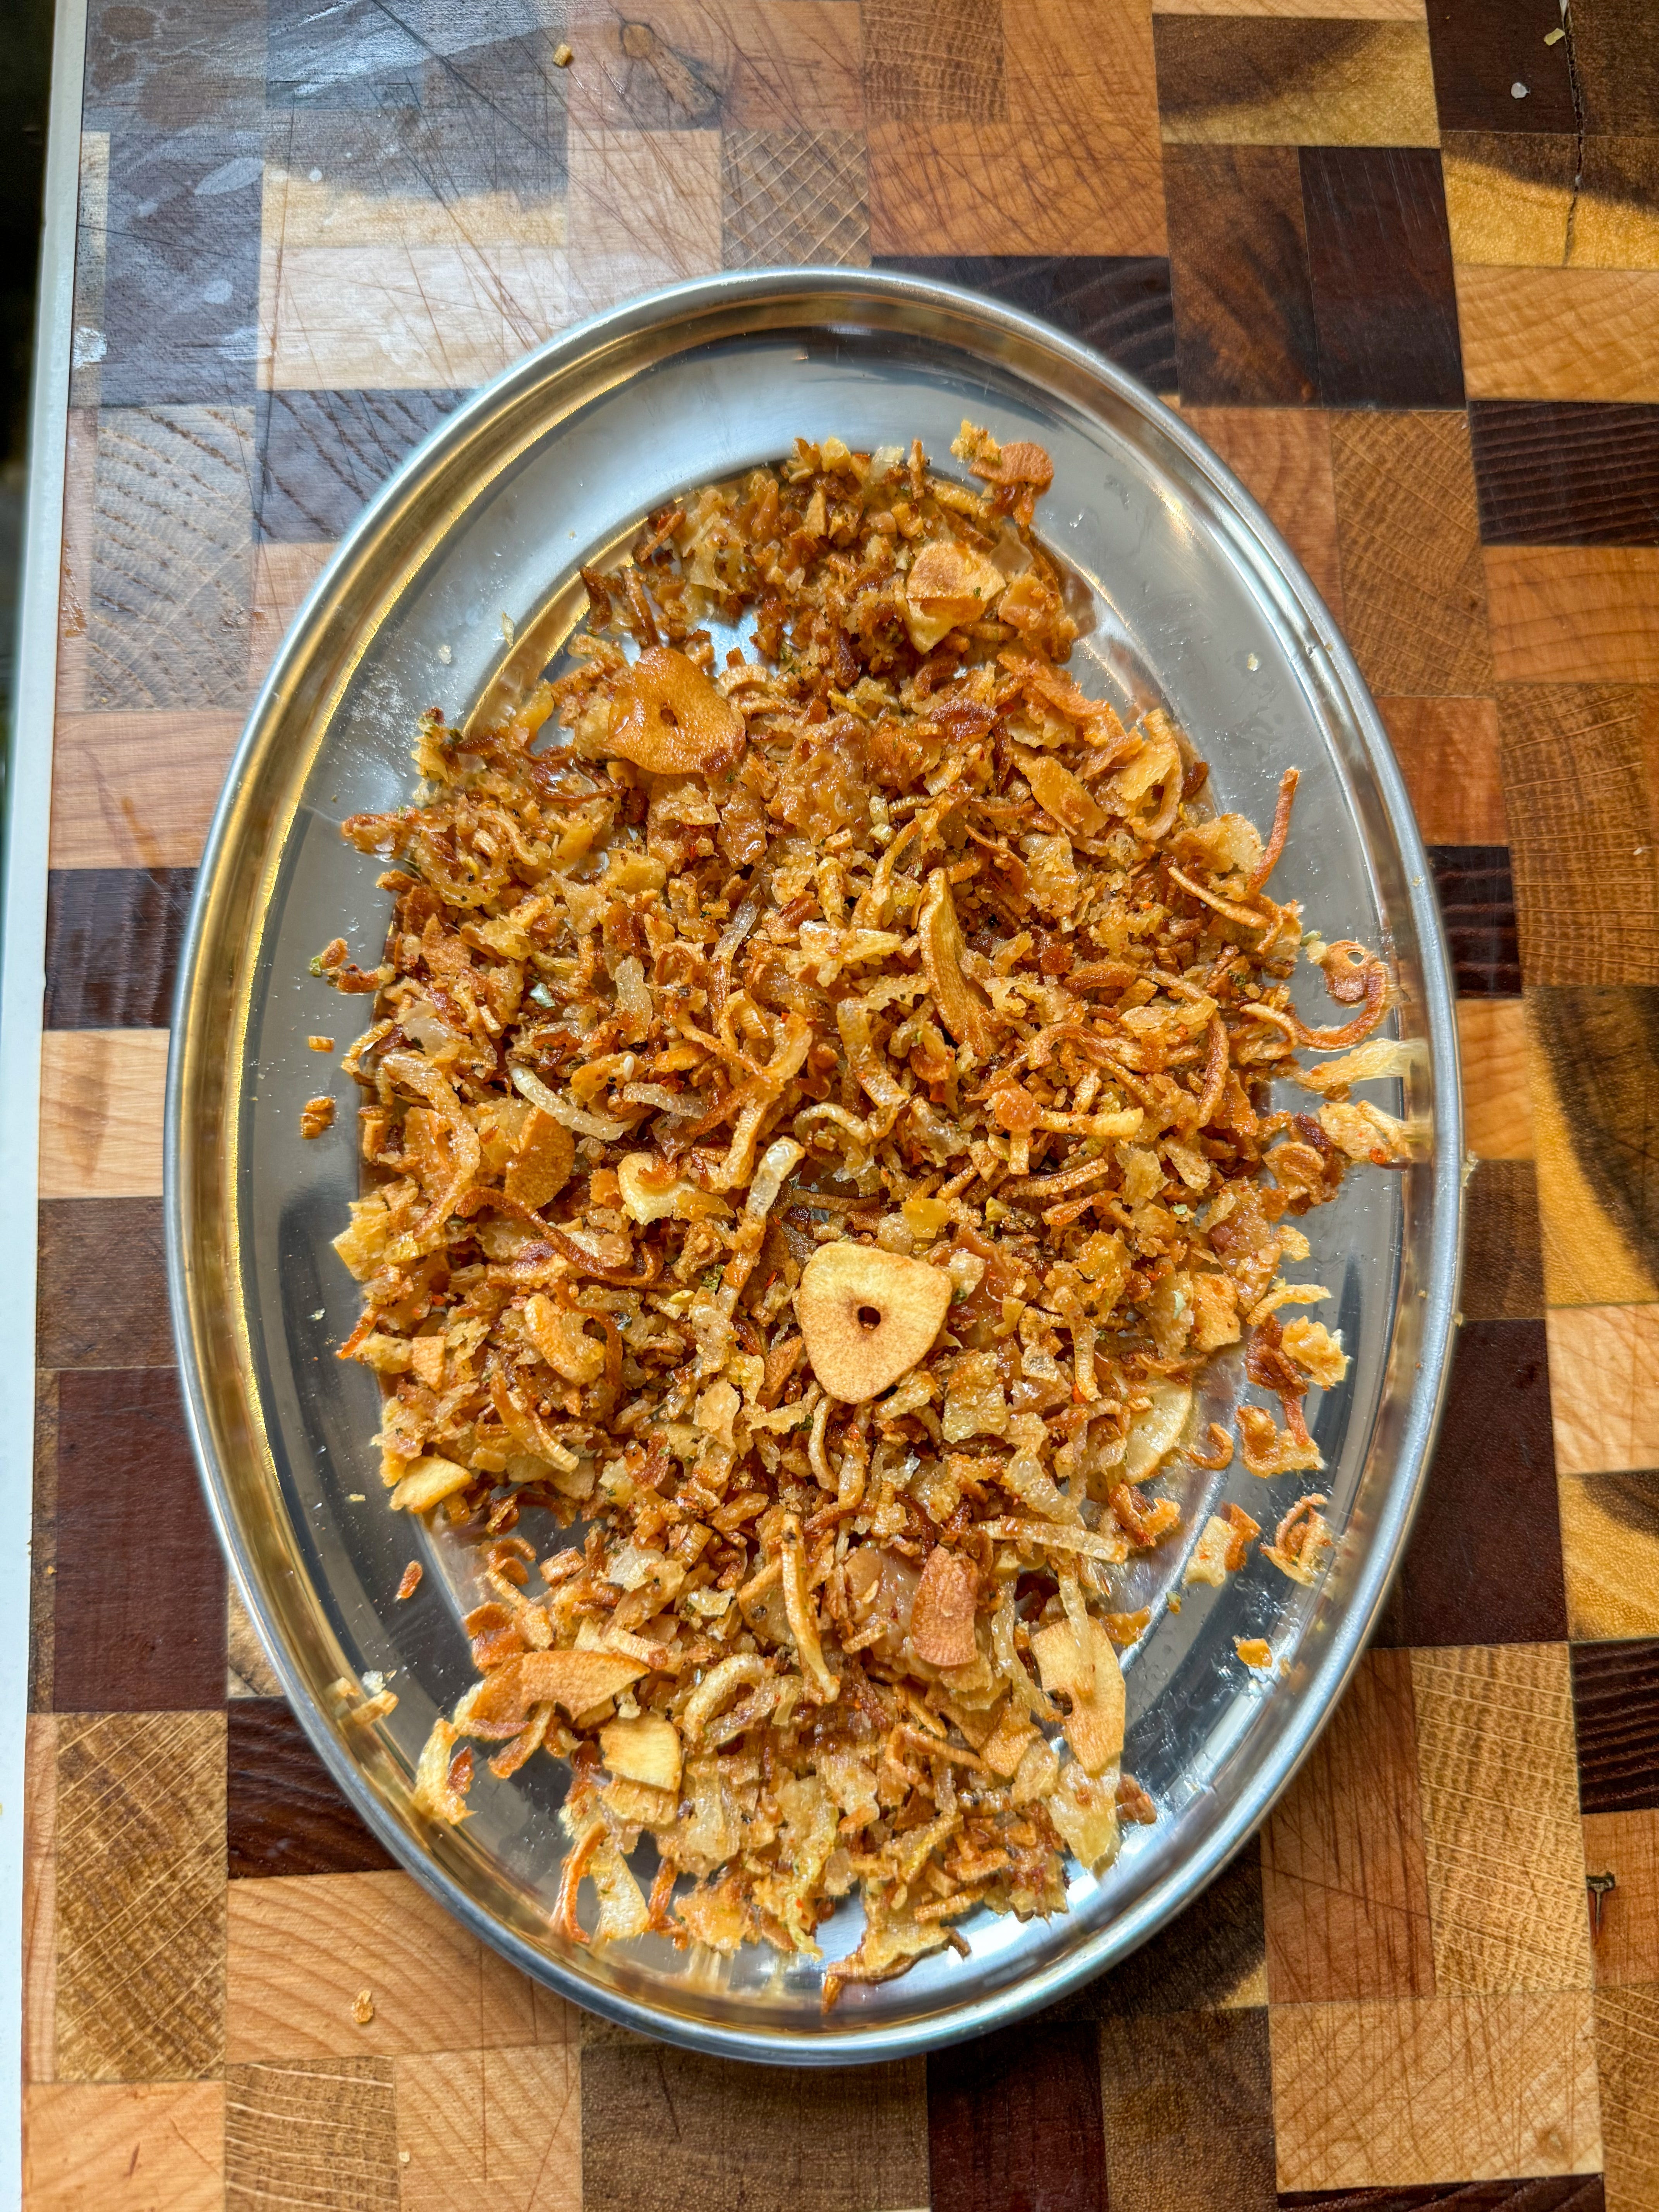
I’m a chef so I do like to make things myself, however don’t feel like you need to make your own buns or fry shallots and garlic until they’re crispy. I went into detail about bread making in this post here. You can buy really good buns from a bakery and most supermarkets (especially Asian supermarkets) will sell crispy shallots and garlic. The reason I started this Substack was to show you guys how I do things, but I know I’m super lucky to have a lot of time to make food and get all geeky about it. Not everyone has that time, so don’t feel like you’ve got to make everything from scratch!
I use buttermilk in this recipe. Most supermarkets sell it now, but if not you can mix 250ml whole milk with a tablespoon of white vinegar or lemon juice. Let it sit for 5 minutes and that’s your substitute. This is just a wet brine, that makes our meat juicy. Im using chicken thighs though and they’re super forgiving, so you can definitely skip the brining process.
Technique & equipment
For this recipe I purposely used a cast iron to fry the chicken, because frying at home is easy. It’s about temperature control and that’s why I’ve been saying for years that everyone should have a kitchen probe. They’ll set you back around £10 but I promise you, you’ll take your cooking to the next level.
You can you use a stick blender, bowl & whisk or food processor to make the mayo. If you’re using a stick blender you’ll simply just add all the ingredients to a tall jug (adding your oil last) and then you’ll blend this, slowly working your stick blender up. You’ll literally see it emulsify in layers. If you’re using a food processor or the old school bowl and whisk method you’ll need to gradually drip your oil in. Once it starts to come together, you’ll be able to stream it in.
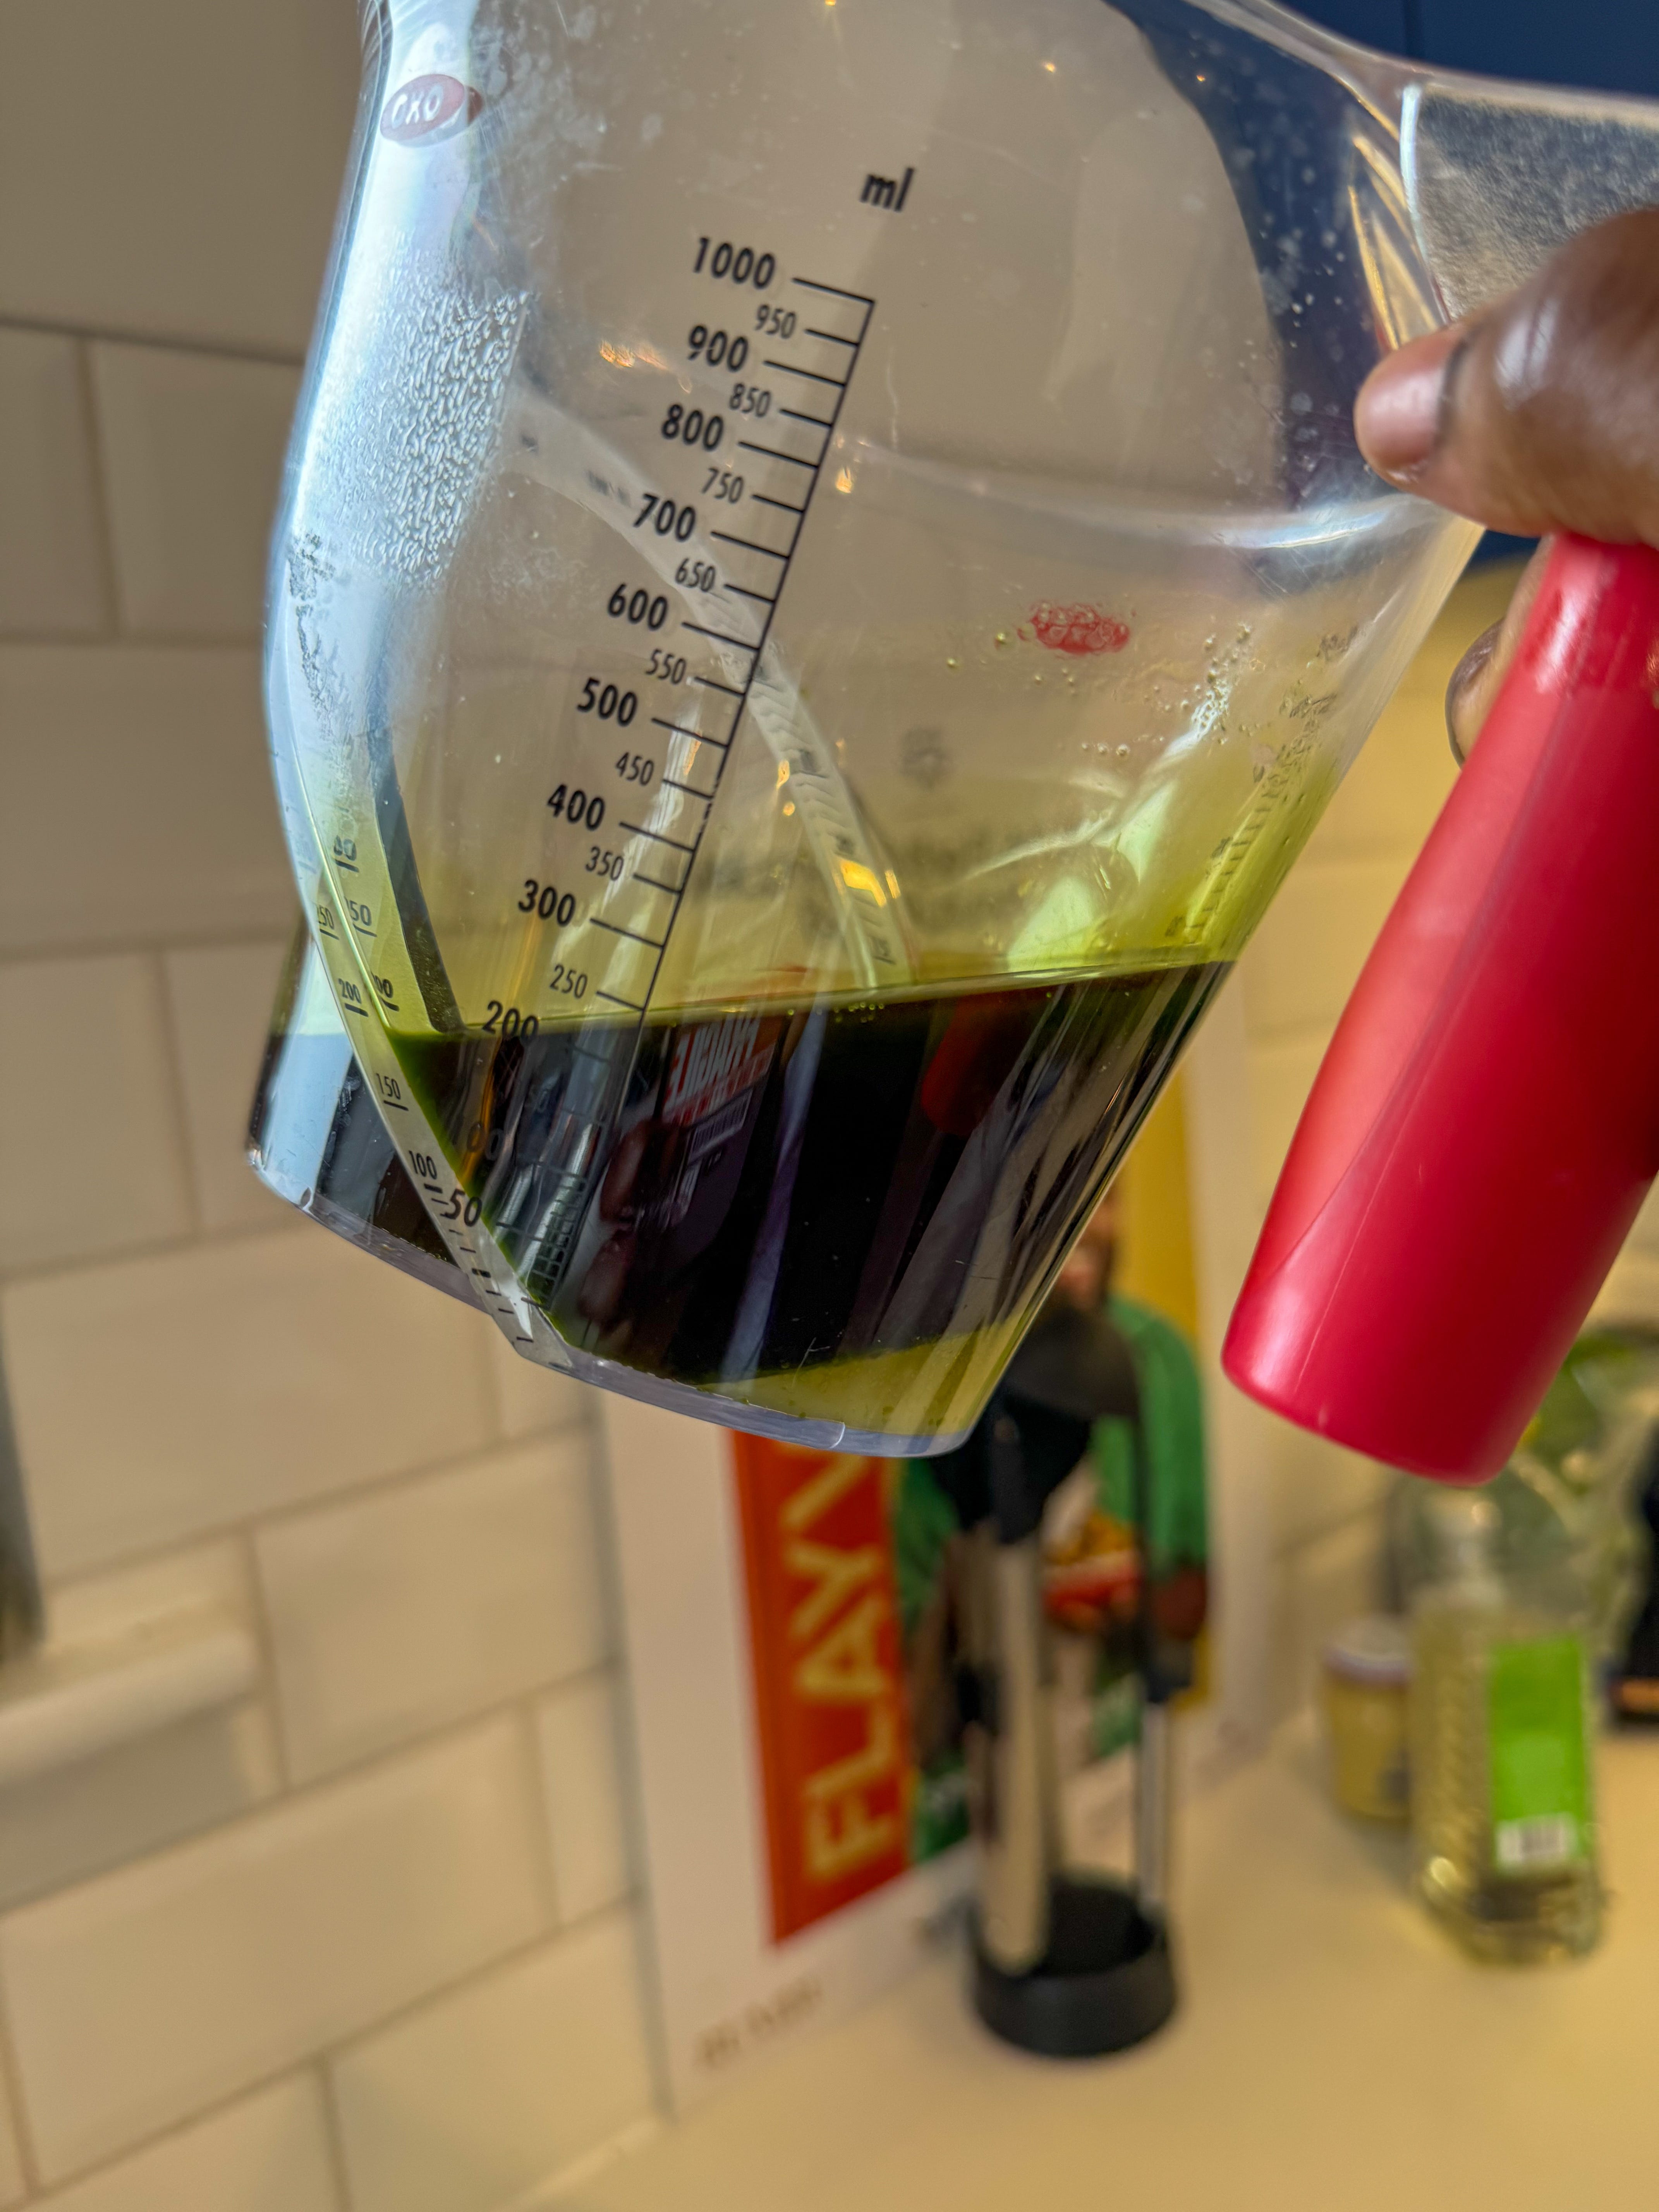
For the scallion and chive oil, it’s a bit of work! Chives have a lower overall water content than scallion (spring onion). So I had to play around with this one and ultimately after trying different methods, you’ll still be left with some water from the scallion. So you’ll need to ensure you separate this from your oil at the end and do not squeeze the pulp that’s leftover! The aim with these herb based oils is to use as little oil as possible so it’s concentrated.
You’ll need a stand mixer for the dough, if you don’t have one then I would say have a google on how to make brioche without a mixer. It’s a longer process and not something I even do myself.
For the pickles, they’re kind of quick. Usually pickling is a process that takes at least a week. These pickles are ready in less than 12 hours but get better with time. Again though, you can always buy pickles and I would recommended polish pickles! They’re some of the best in my opinion. I picked up some sarsons pickling vinegar, it claimed it was already spiced but it definitely needed some added love!
Recipes and Methods
Quick-ish pickles
Handful of dill
1 garlic clove